In this section it will be described the path i followed until i reached my final project. Since wildcard week i started to test different materials and techniques concerning smart textiles. In my final project i will include the ones that my motivation stayed strong until the end(in order to complete the project), the ones which i managed to complete with the knowledge that i earned from fab academy and the ones which were possile to be done during the fab academy period.
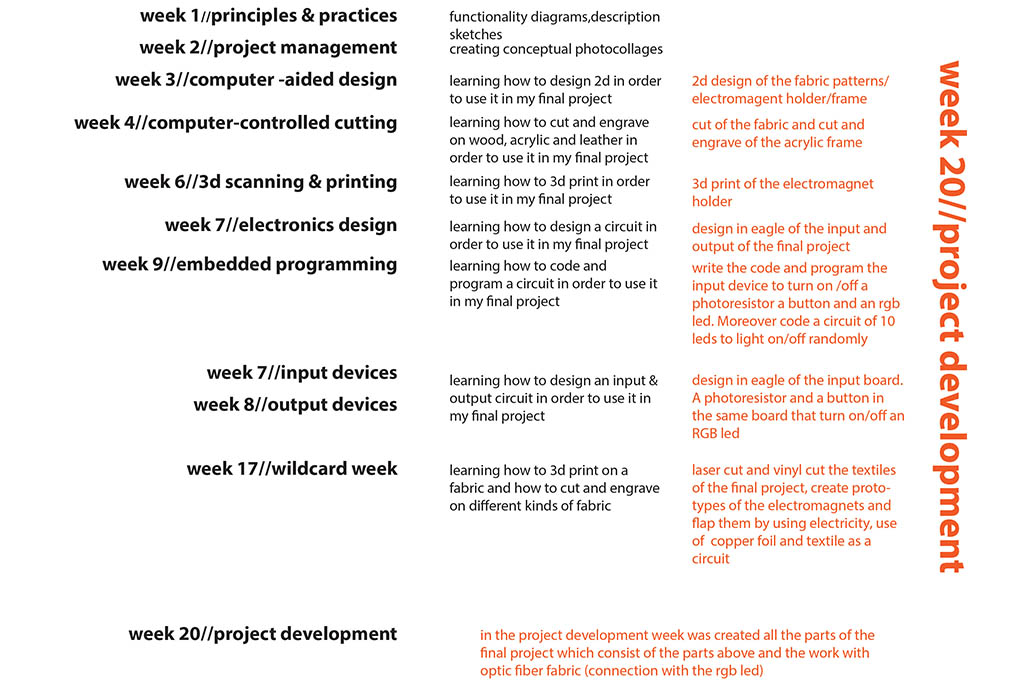
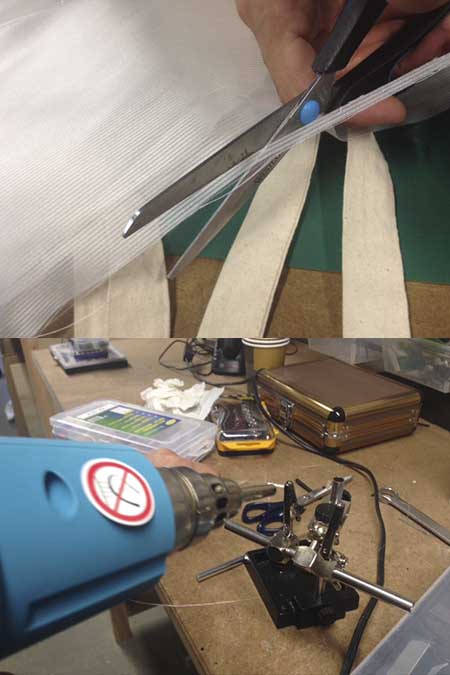
The first idea for my final project was a optic fiber textile that will depict different constellations everytime you press a button. I ordered a row optiv fiber textile and one by oe i removed the optic fibers from it. I grouped them in groups of six and with a heat gun and a shrink cabel i created two tubes, an optic fiber one and one with the led. I placed the two tubes inside each other and i shrinked the two cabels once again with the heat gun. My hand made optic fiber stripe was shinning.
The second step was to sewed them in a fabric together with a circuit of leds on the back. I created the circuit and i soldered the leds in parallel with the right resistors in order to give the exact same current to all of them. According to my idea, with the push of a button, different constellations/leds will light every time. Unfortunatelly, this project was taking so much time and i had to exclude ot from my final project.
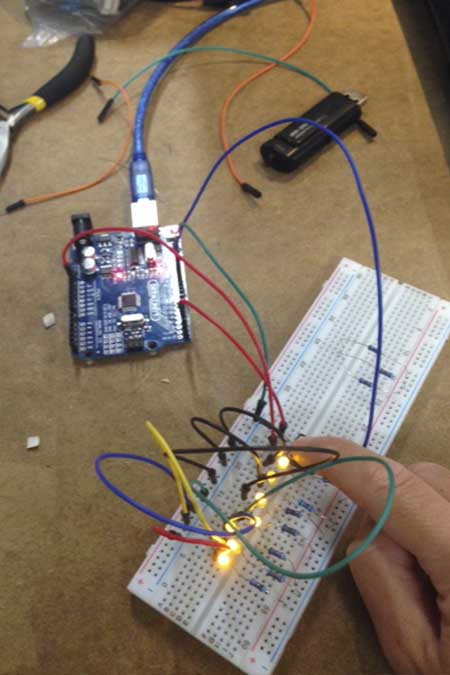
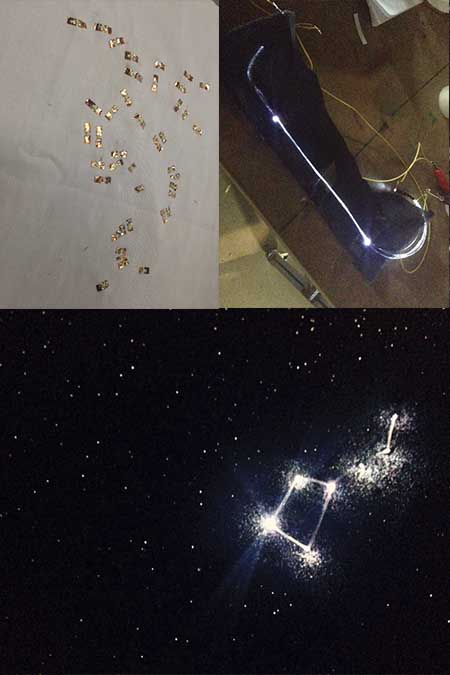
Since i always was curious to learn electronics around leds i made a prototype with ardunio. I connected them in parallel with a 220 Ω resistor to each one of them. It worked ;-)
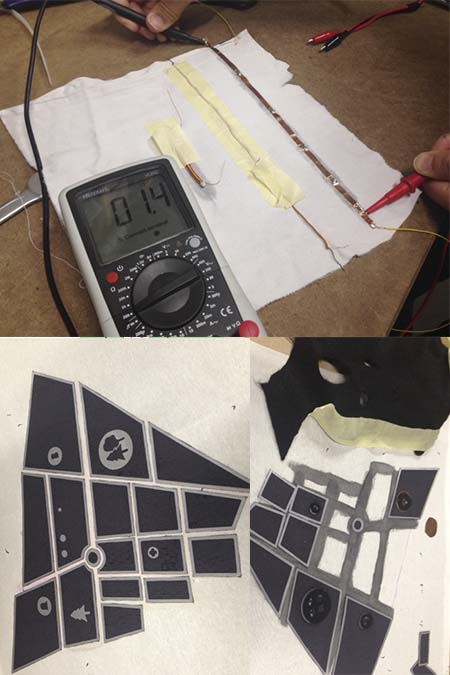
The second smart textile that i experimented with was a photochromic map. I used fabric vinyl and a press heater to create an abstract map with fabric buttons and on the back, on another fabric , i painted with the photochromic paint. Behind the fabric i created a circuit with three different paths that they chabge into white when current passes through the 499 Ω resistors.In the end i achieved the change of color of the four different paths but i realized that i needed a lot of power to do it...and this was burning almost the fabric ;-(. I also used different ways to heatthe paths, liked different wires with a looooot of turns and different resistors.You can see my VIDEO and have an idea.
A combination of copper foil, wires and a light fabric leaded me to the creation of a smart textile that will be consisted out of many parts that could move and bring air to an opaque second fabric below them. i decided the movement to happen with electromagnetic power and this could happed with a coper foil, coper tape, two cables, and coated copper wire. The inspiration was a tutorial i followed for smart textiles and then i decided that i would like to involve the idea into a dancing textile.
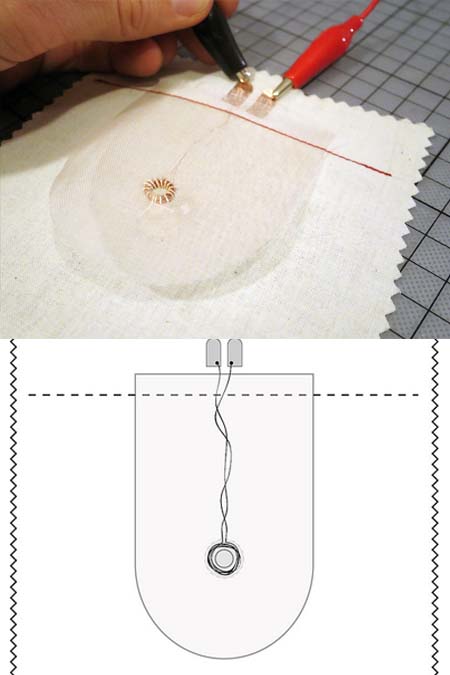
I first tool the decision to create the electromagnet my self. First i sewed the flet and the copper foil in the opaque fabric and after i created a pocket and i placed in the back of the opaque material. In the pocket i placed a small but strong magnet. Since an electromagnet behaves as a magnet only when electicity pass by i need to create a circuit that will cross my wire made magnet. I used a plastic ring and i wraped coated wire around. Unfortunatelly, the movement was very weak and in the end the wire was burned. I decided that i need more turns and a thiner wire. This formula for the electromagnetic power solve my problem.The formula is FB = qv × B and you can learn more about it if you follow the link.
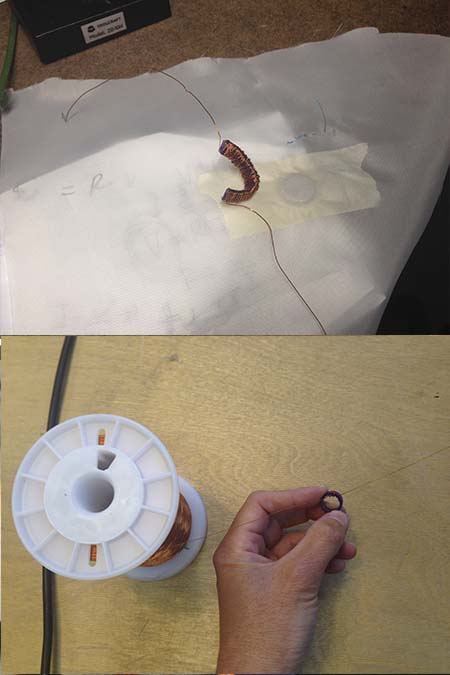
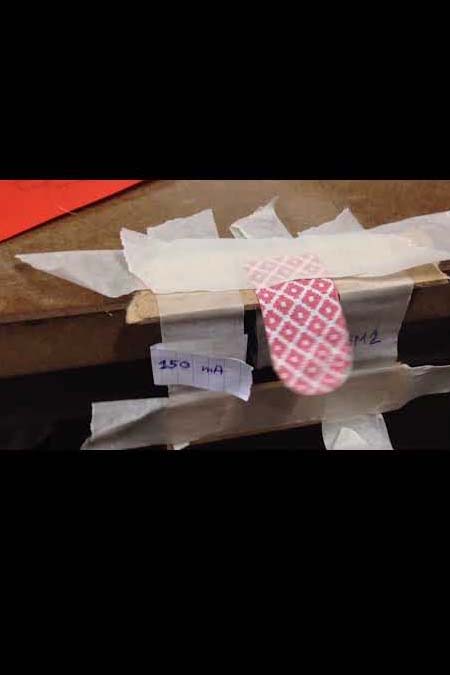
I ordered and i finally had my 0,1 mm enamelled copper wire. I used it to create the electromagnets with a lot of turns and with the right wire this time. I 3d printed in PLA diferent sized of tubes that i wil rool the wire in and i amde a lot of tests to decide with diamter was the appropriate. I used also a drealer and a hand made construction in order to roll the wire faster.You can see MY VIDEO
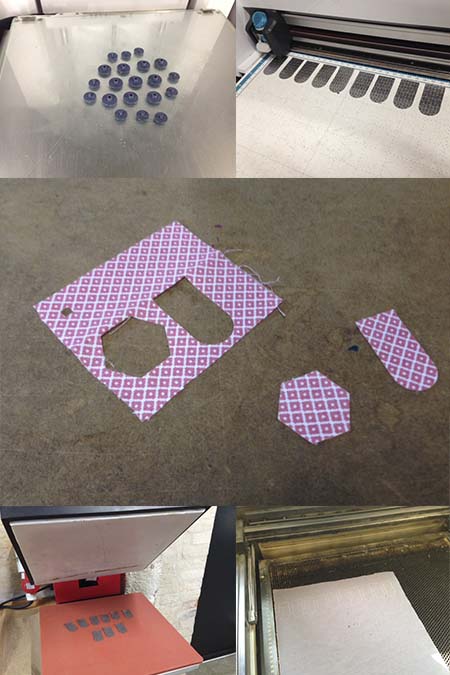
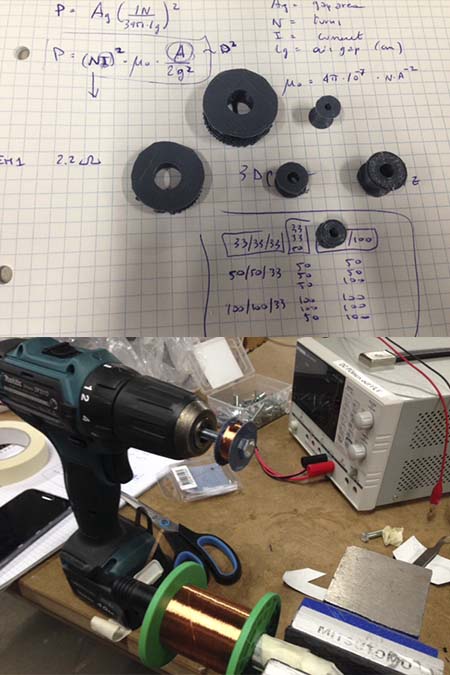
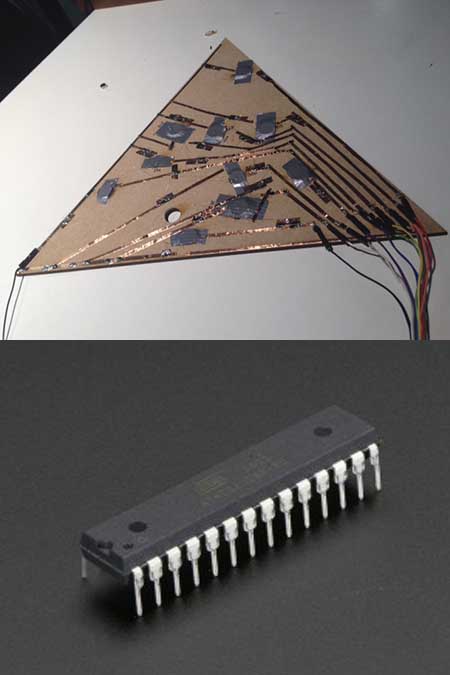
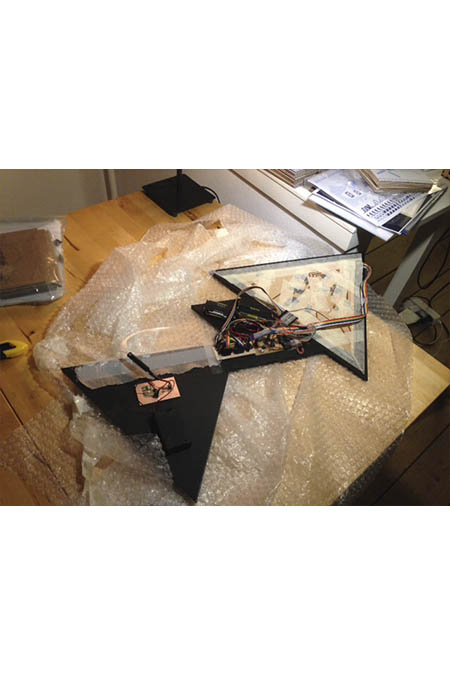
When i found the right diameter of the plastic tube i 3d printed 10 of them (PLA, colorfab, 220 temp, ultimaker 2+) and i created all the electromagnets i needed. Later, i laser cut all the fabric parts i needed and i vinyl cut some specific tecture that i wanted. I use the press heater and my small fabric pieces are ready to be transformed into smart ones.
As soon as i soldered and i assempled everything the first test was succesful. You can see my VIDEO about my flapping textile.
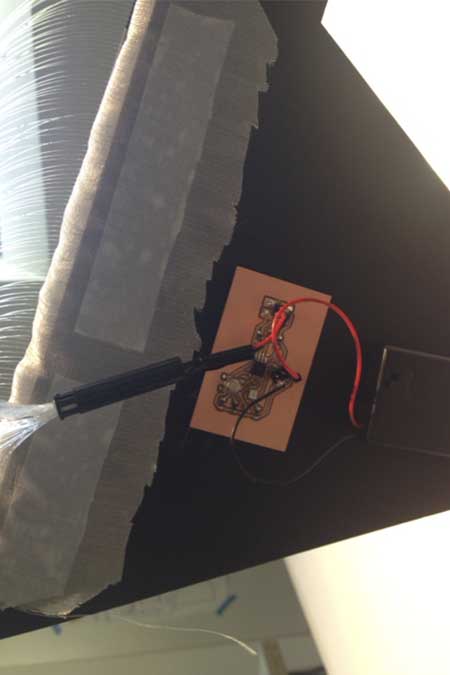
After having tried a lot of boards and different ways to design the phototrasistor and the rgb output board i decided to integrate everything in one board. I added also a button to use it as a plan b in case the phototransitor will not work. I took this decision after having big problems with the networking and communication week. My boards workedperfectly the first day but unfortunatelly they stopped the day of the final presentation.
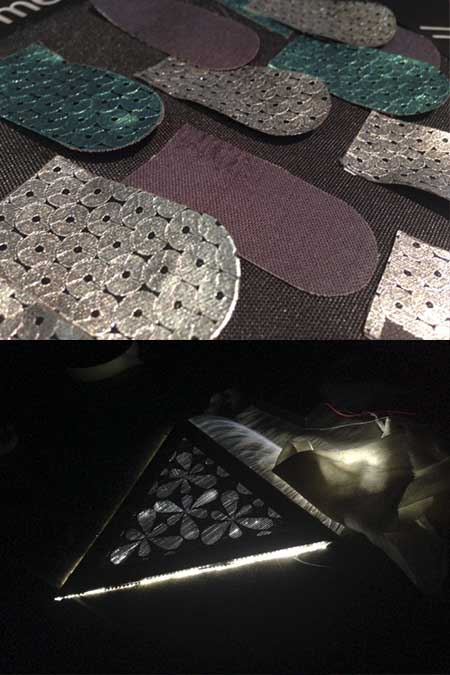
The textiles of this project were all laser cut and vinyl cut. The optic fiber textile were bought raw and the optic fibers were attached to an rgb led.
The second part of the electronics of this project was created with a board that i designed and an arduino board. Each electromagent is connected to a relay since the need high current to flap.
The electromagnets are organized in a system behind the fabric were they are connected with each on with the VCC and all of them to a commonnground through a relay. In order to avoid the cables i used the copper foil for the circuit.
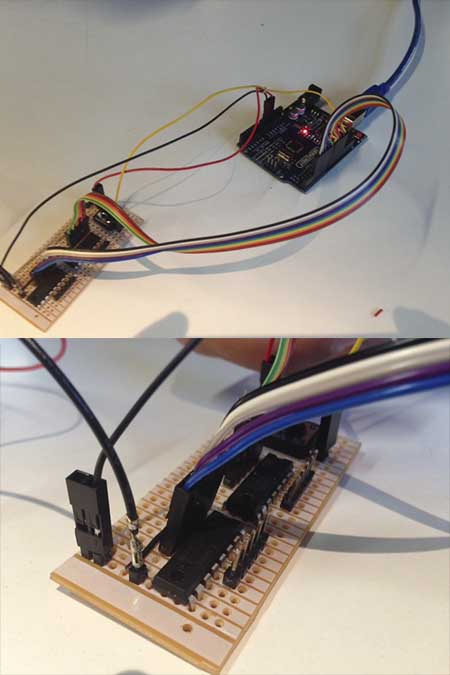
After the advice of my evaluator Wendy, i decided to replace the arduino with the fabduino that i created in the electronics design week. Actually the first tests i made for my final project were made by my fabduino but in the end i chose the arduino solution since the code that i wrote runs a random generator which uses numbers- the pins of the arduino. After the graduation and since i had to replace it, i found a way to replace the names of the fabduno pins (ex. PB3, PD4 etc) with numbers. For this i had to consult the pin diagram of the Attinymega 326 that i used for my fabduino. In the end, i changed the pins that theu correspond to the pin of the arduino and i uploaded the code. I first tested the code to some leds in the breaboard and later i placed the original board with the relays. All the activity is visible in the videos below.
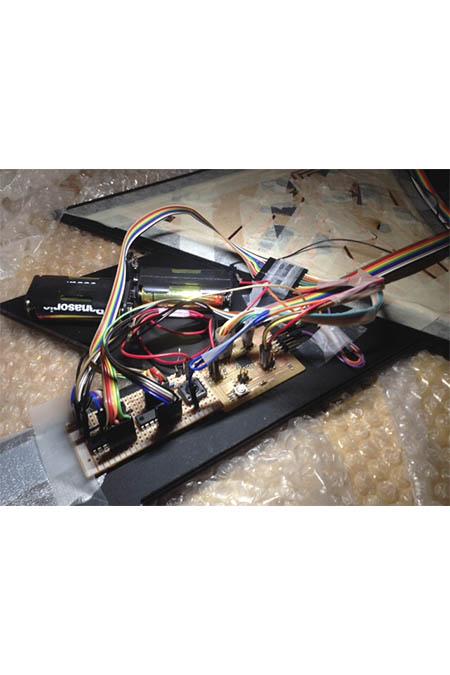
This is the FLAP ME panel which has 10 electromagnets and 2 boards.The electromagnets need a high ampere current which cannot be delivered by the microcontroller. They are connected to a first board with 2 relays and the on/off button. The second board is the fabduino with the microcontroller which opens and closes the relays.Both are powered by 6 volt battery pack.There is an explanatory video below.
The electronics consist of three boards. The independent board of the LIGHT ME panel which consists of an impur device(photoresistor and button) and an output (led and optic fiber fabric). The FLAP ME panel consists of a board with two relays, one button and ten pins and a fabduino with a atiinymega326 microcontroller.
The input, output and networking and communication devices of this project are documented in each week's documentation.
The conclusion of this week is that smart textiles combine a range of different techniques and electronic knowledge. Fab lab's and digital fabrication is the ideal place to develop an idea like this.
Electromagnetic flapping,, Thermochromic fabric,, Heat press mashine, Ultimaker 3d printer Brother scan'n'cut mashine, My video about how to make an electromagnet in a easy way, My video about of electromagnetic flapping, electromagnetic power explanation,